
Think You’re ‘Bad’ at Freehand? Try This Instead.
When I was a young girl, I loved to draw but very often I’d moan “I don’t know what to draw.”
What I really meant was: “I don’t feel inspired.” and “Muuuuum! - tell me what to draw so I don’t have to decide”. I didn’t want to draw a ball, or an apple, or one of my mum’s tea cups or flowers. Very often I’d draw my hand — not because it was exciting, but because it was there and provided a bit of a challenge. I’d hold it still (badly), squint, and try to remember everything I’d ever been told about shading. I didn’t have the Internet but perhaps a book on drawing. I don’t remember now.
I do know I had a HB pencil (and other graphite ones I had no idea how to use properly) and a vague sense of what “light source” meant. But I got disheartened easily. The drawings never looked quite right. Something was always off. (Side note: hands and mouths - hardest things to draw with a line art as a starter, let alone freehand. Kudos to 15 year old me for trying at all).
So I stopped.
It would be years — decades, even — before I picked up a pencil again. This time with coloured pencils, a more grown-up sense of patience, and a willingness to be terrible for a while.
Within a few days of trying coloured pencil for the first time, I’d drawn a cat eye, a paw, an ear, a turtle, my kids' eyes — and finally, a full pet portrait. It wasn’t too bad. It was also the start of everything.

To progress with coloured pencils as rapidly as I have done, I’ve had two things working in my favour:
Twenty years in academia = a growth mindset: try → make mistakes → learn.
Childhood doodling had trained my eye for proportion, even if I hadn’t realised it.
So when I talk about how quick sketching can help you improve your detailed work, I’m not saying it from a place of theory (nor a talent I was born with). I’m saying it as someone who’s learned the long way around — and is now finding that a path back to sketching is elevating all my artwork.
Two Valid Artforms: 30-Hour Portraits vs 30-Minute Sketches
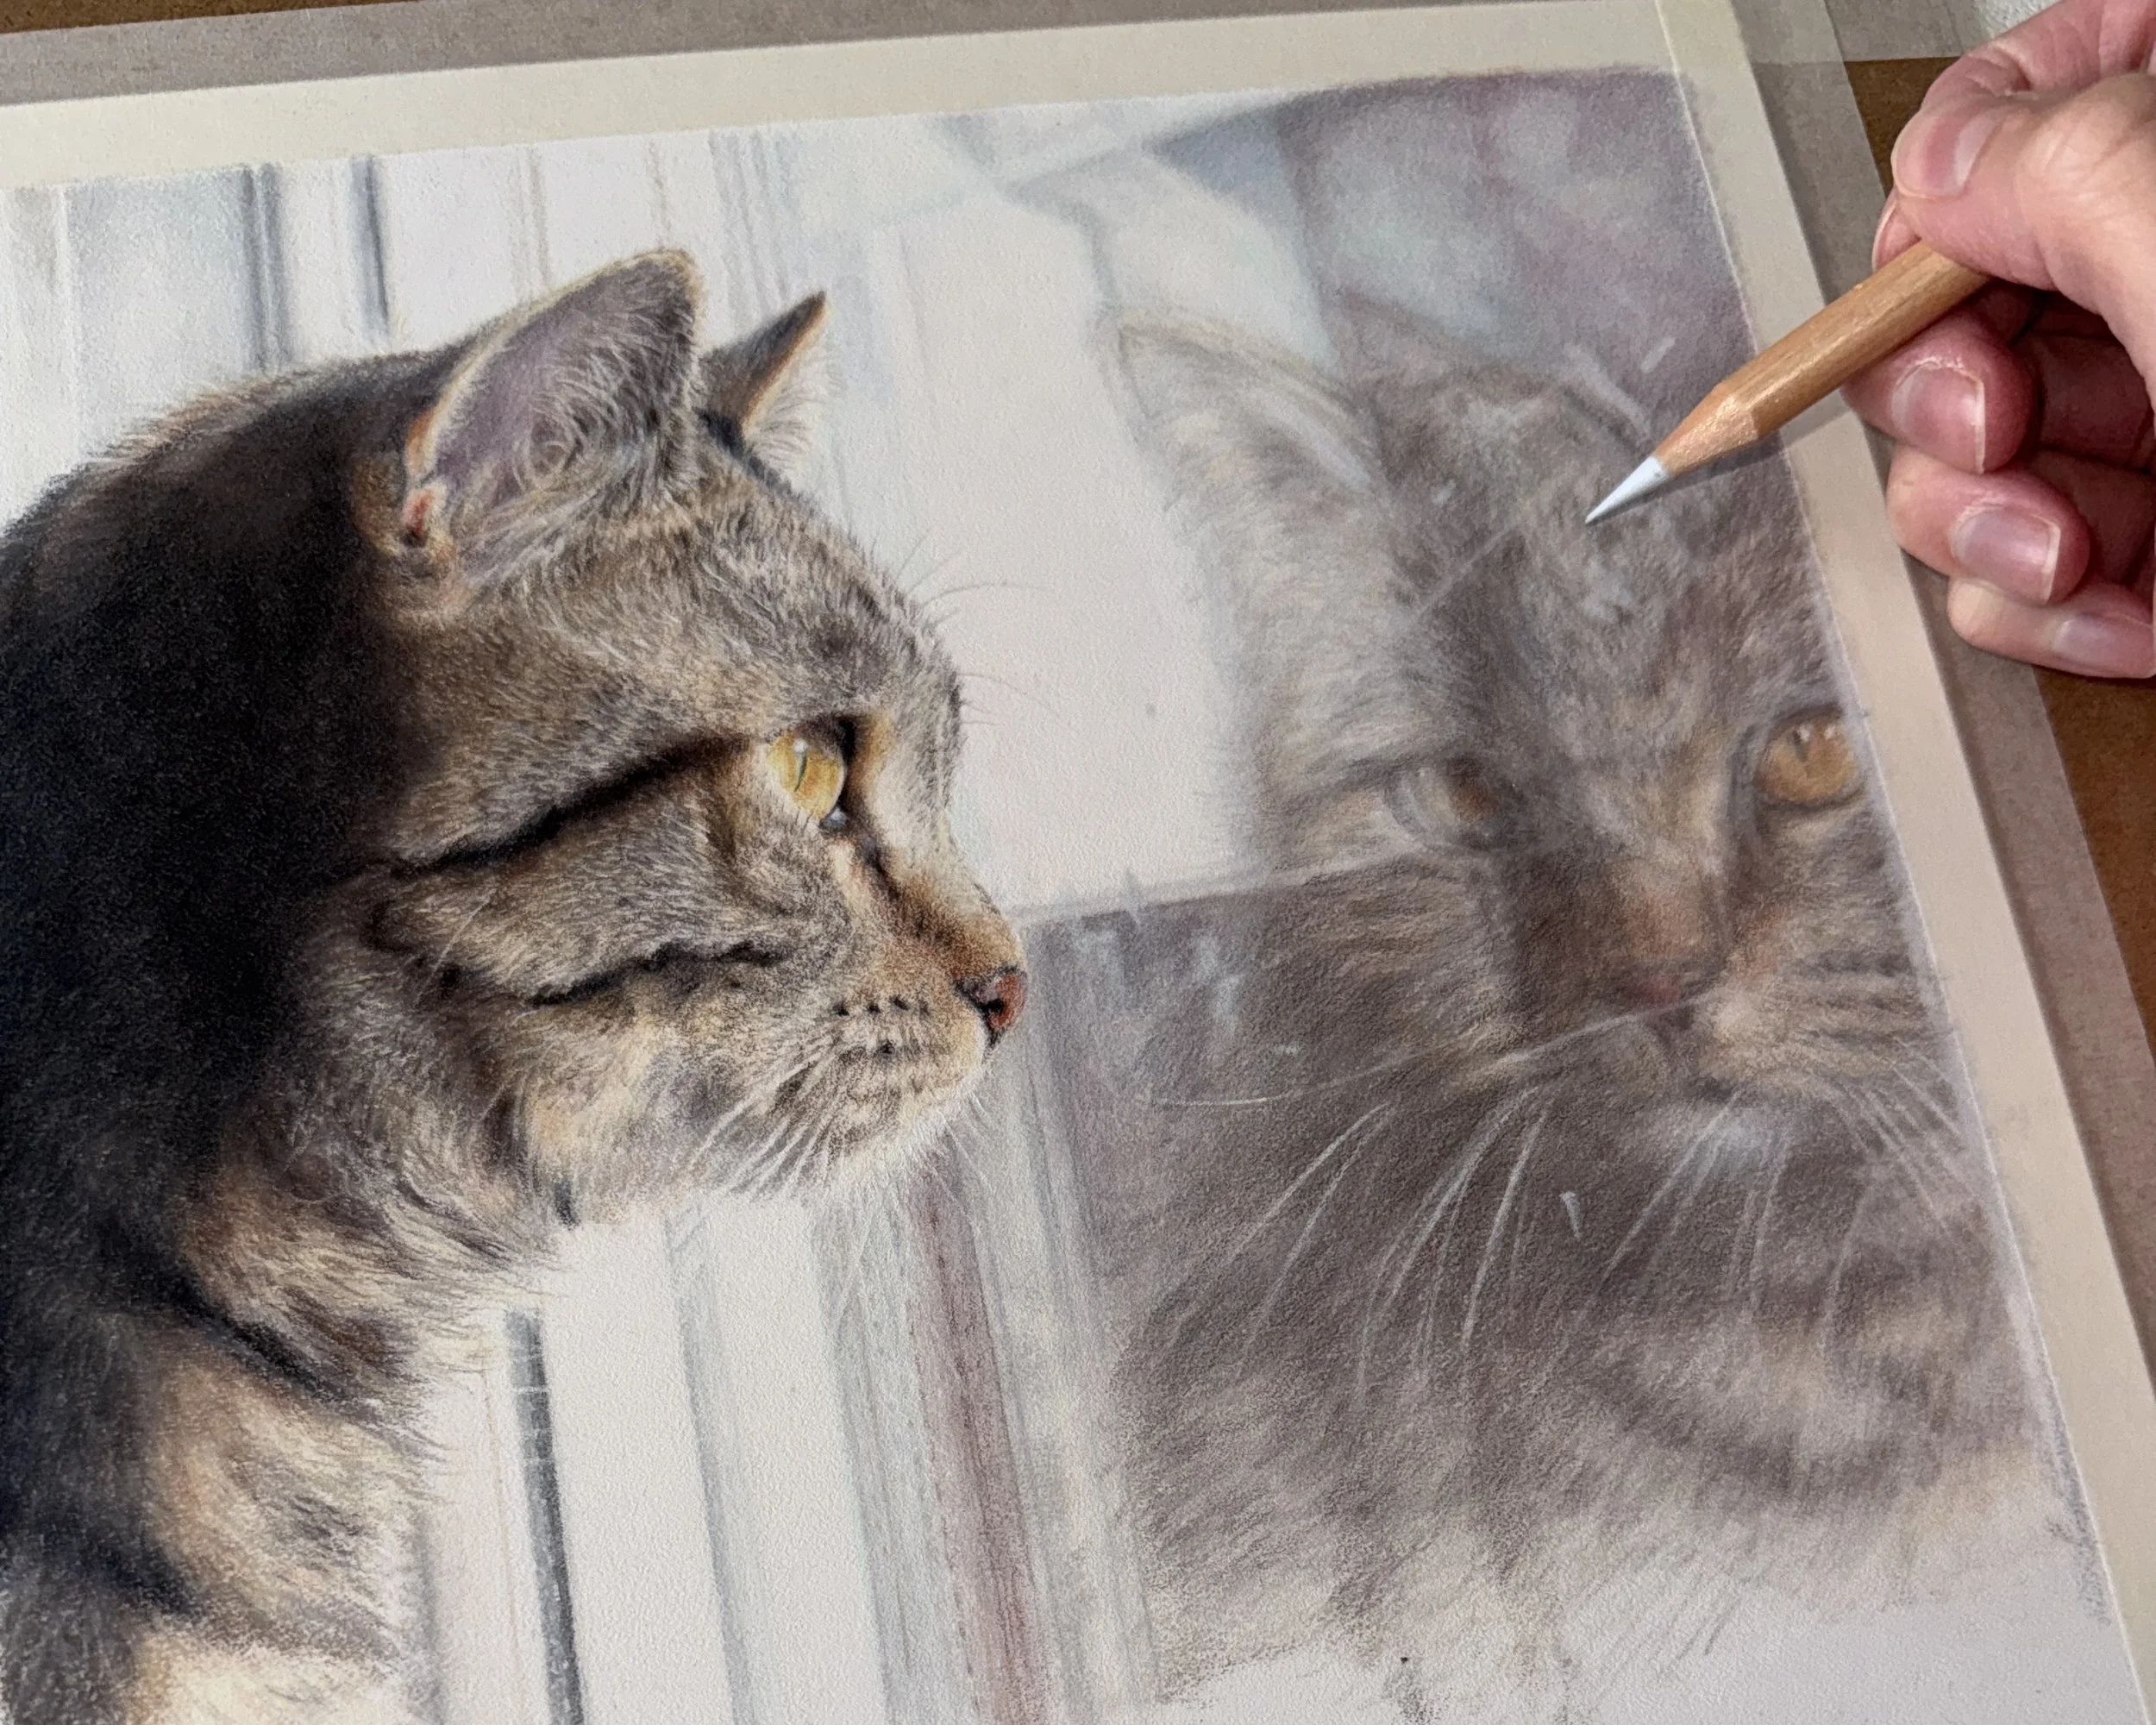
I’ve been drawing animals for three years now. My normal process for a portrait commission follows a structured path: agree on a photo or composition, create a line art (tracing key features from a printout with a lightbox or window, or working digitally), transfer the line art to my drawing surface, then begin the ‘proper’ drawing. Light to dark, perhaps 10+ layers, layering and blending for 15, maybe even 30 or more hours. I work slow, often in pockets of time.
The more full coloured pencil portraits I complete, the less I work in small sections. Instead, I find myself working across larger areas, constantly checking for balance—not just in colours, but more importantly, checking and adjusting that 3D form as I go. Are the angles sitting right? Does the structure feel solid? Why is the cat cross-eyed? I’m not sure the ear goes that far down the face… (eek).
That's where my first love comes back in: sketching. It's a completely different skill from the slow and methodical pencil work, but equally valid and surprisingly complementary (why yes, yes indeed). Let me explain.
Why Quick Studies Transform Everything
I wrote a blog post a few months back advocating for terrible (cat) sketching from life — and how that mindset shift of ‘not everything has to look IG ready’ alone made me a better artist.
(TLDR: I didn’t master sketching. I just stopped expecting it to be good and some of them were more cat than furry potato. Win.)
These quick studies gave me something else too: a way to test what I thought I knew.
You start recognising the shapes beneath the fluff.
You stop asking “what’s wrong with this leg?” and start asking “where would the elbow be?” (and Amii if it’s there, that cat must have been in a horrific accident as a kitten because there’s no way it’s walking anywhere).
Sketching develops a mental mapping system—an invisible framework that helps you understand how features relate to each other. When you're working freehand, you're constantly making decisions about proportional relationships: where does the eye sit relative to the nose? How does the forehead connect to the muzzle? These thoughts about relative positioning become visualised on paper for all to see.
For a full coloured pencil portrait, some artists start with their own line art, others build from existing foundations, others work entirely freehand—there's no right or wrong path. What sketching brings to any realistic drawing approach is a tool for a more informative line art and a mechanism for checking your drawing as it develops.
Whether you actually sketch these construction lines on paper, or just follow these ideas in your head, knowing what to look for might help you next time a drawing feels off, or it doesn't quite represent the subject you're trying to capture.
Before You Begin: A Pre-Sketching Exercise
If you're completely new to sketching, I'd recommend you start here: print out your reference photo and practice seeing the construction lines I demonstrate in the first video below. What shapes do you notice?
Honestly, I started with months of very questionable drawings of my cats. (Which moved. Constantly.). Be kinder to you: start with a (stationary) 2D print out.
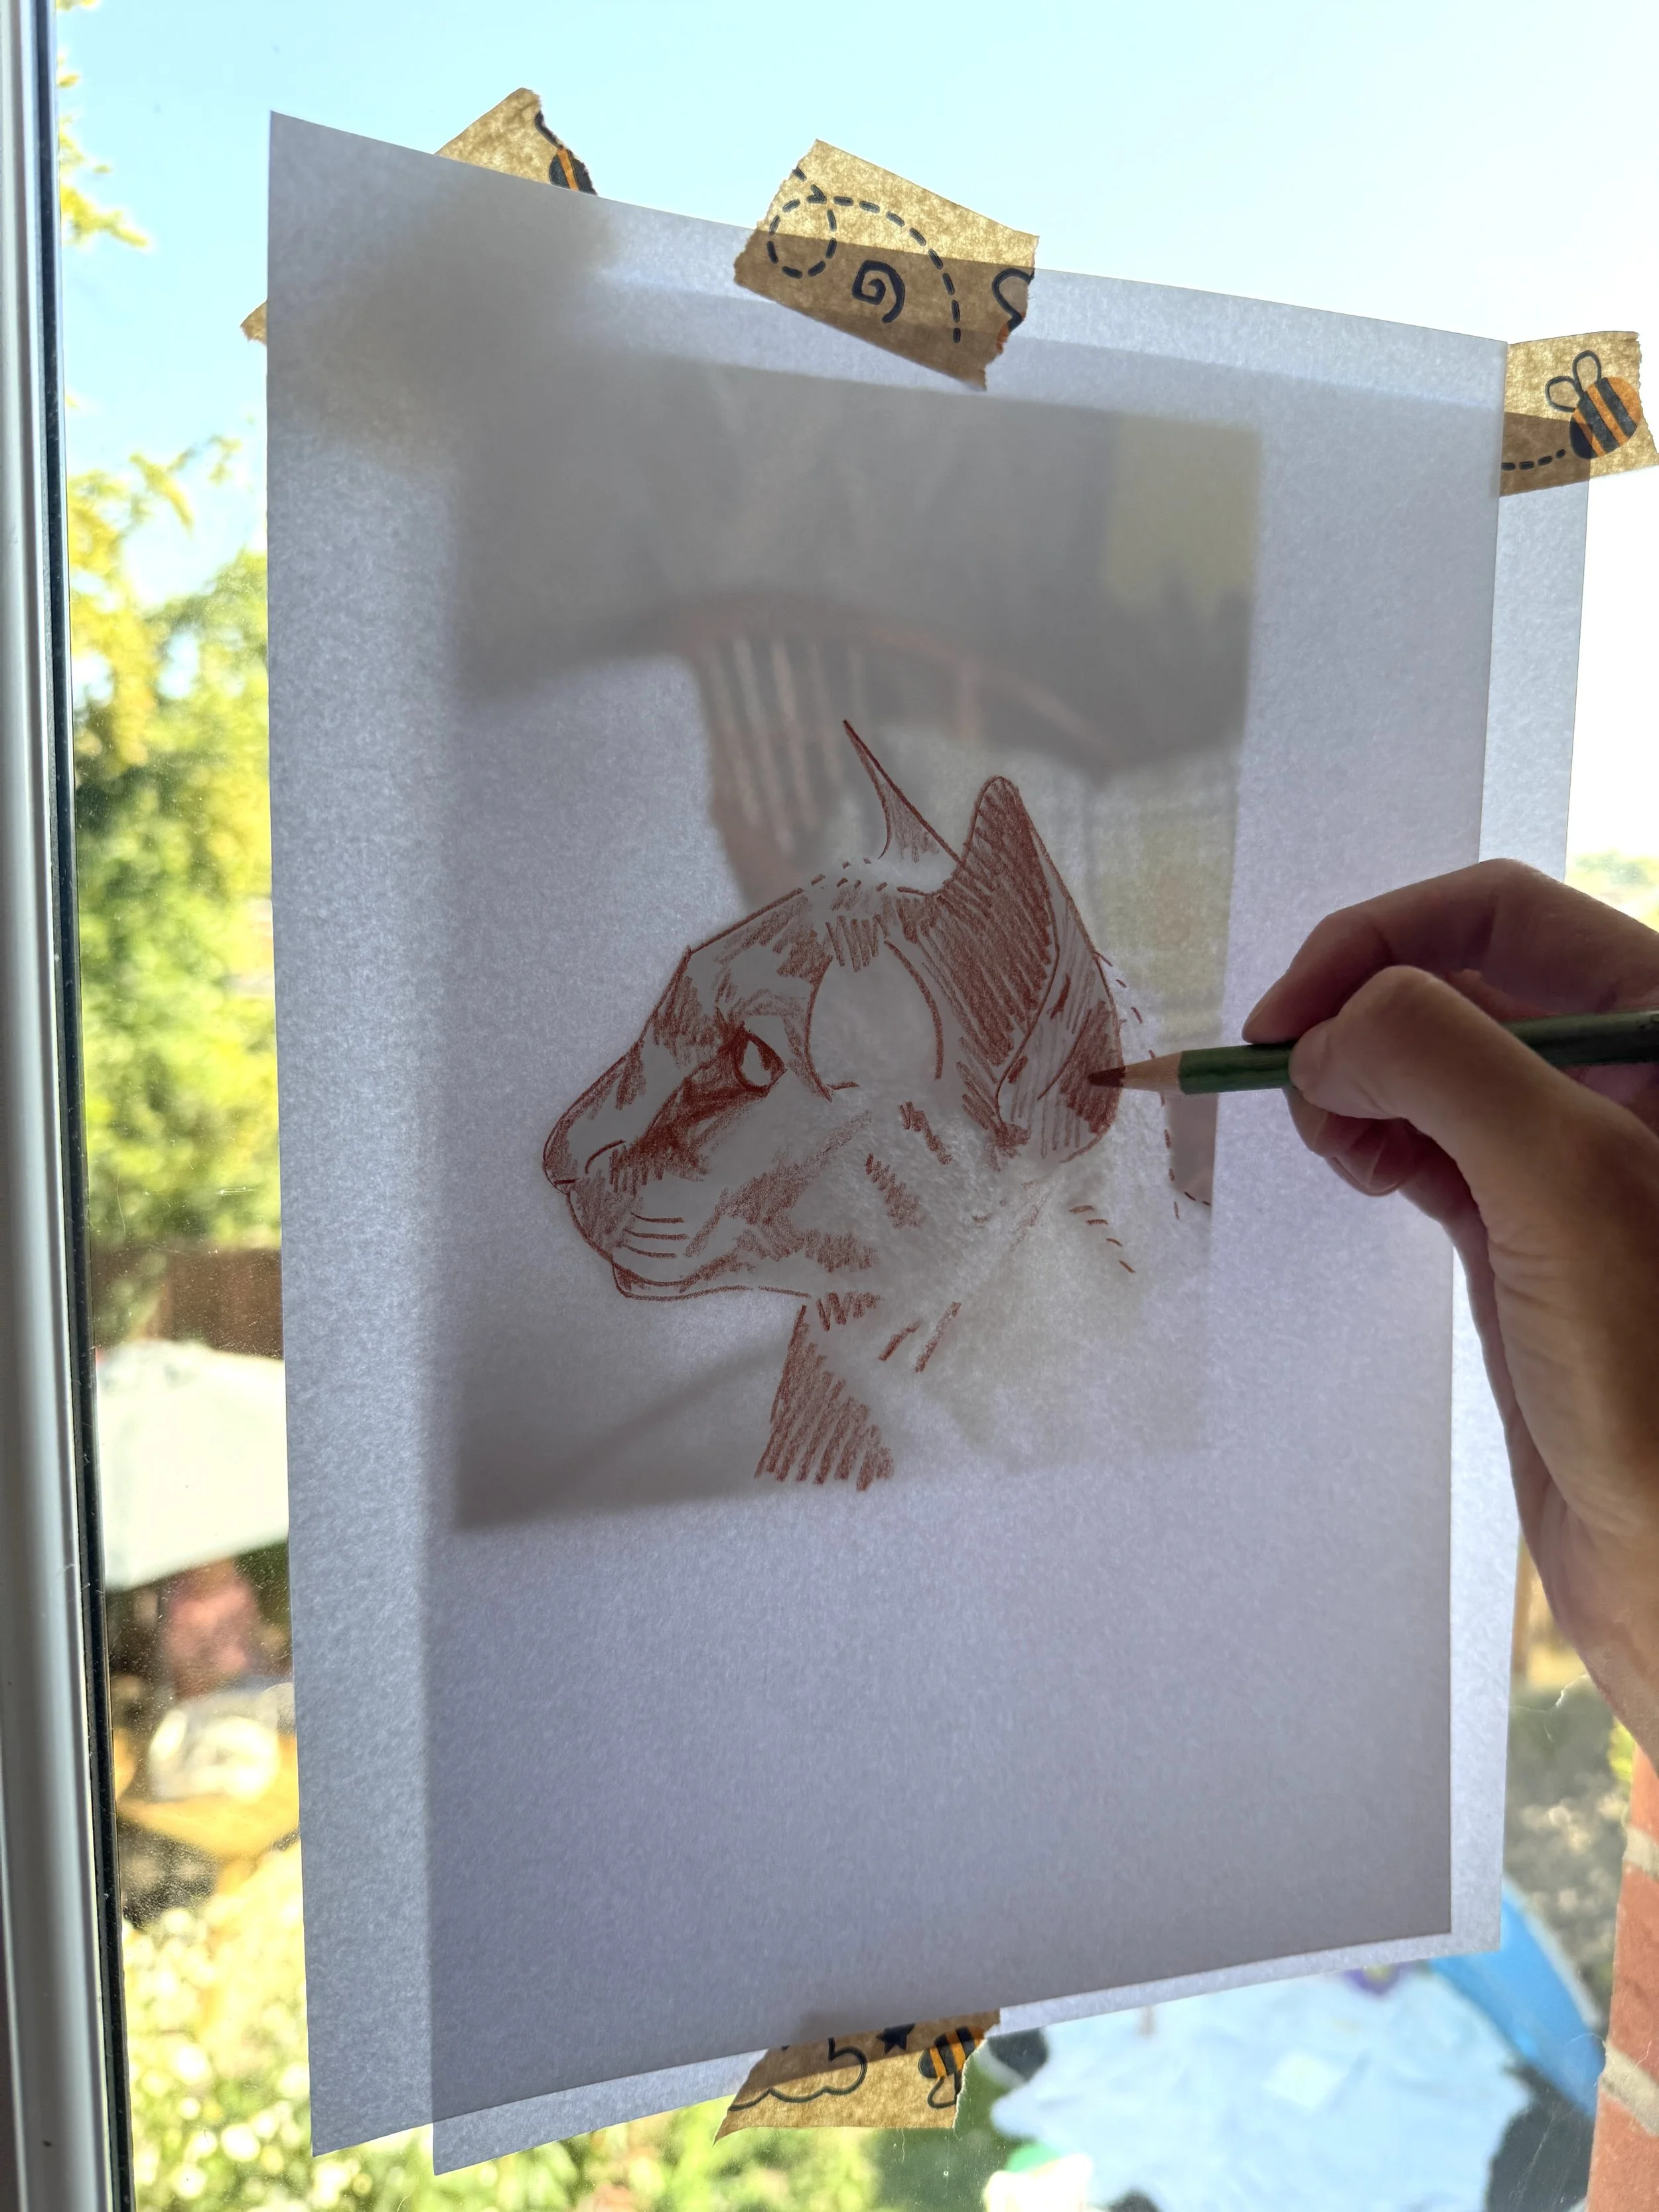
Now try this: tape your printed photo to a window with printer paper on top, or use tracing paper if you have it. Don't aim to copy every detail—instead, look for the big shapes, the angles, the way features connect to each other.
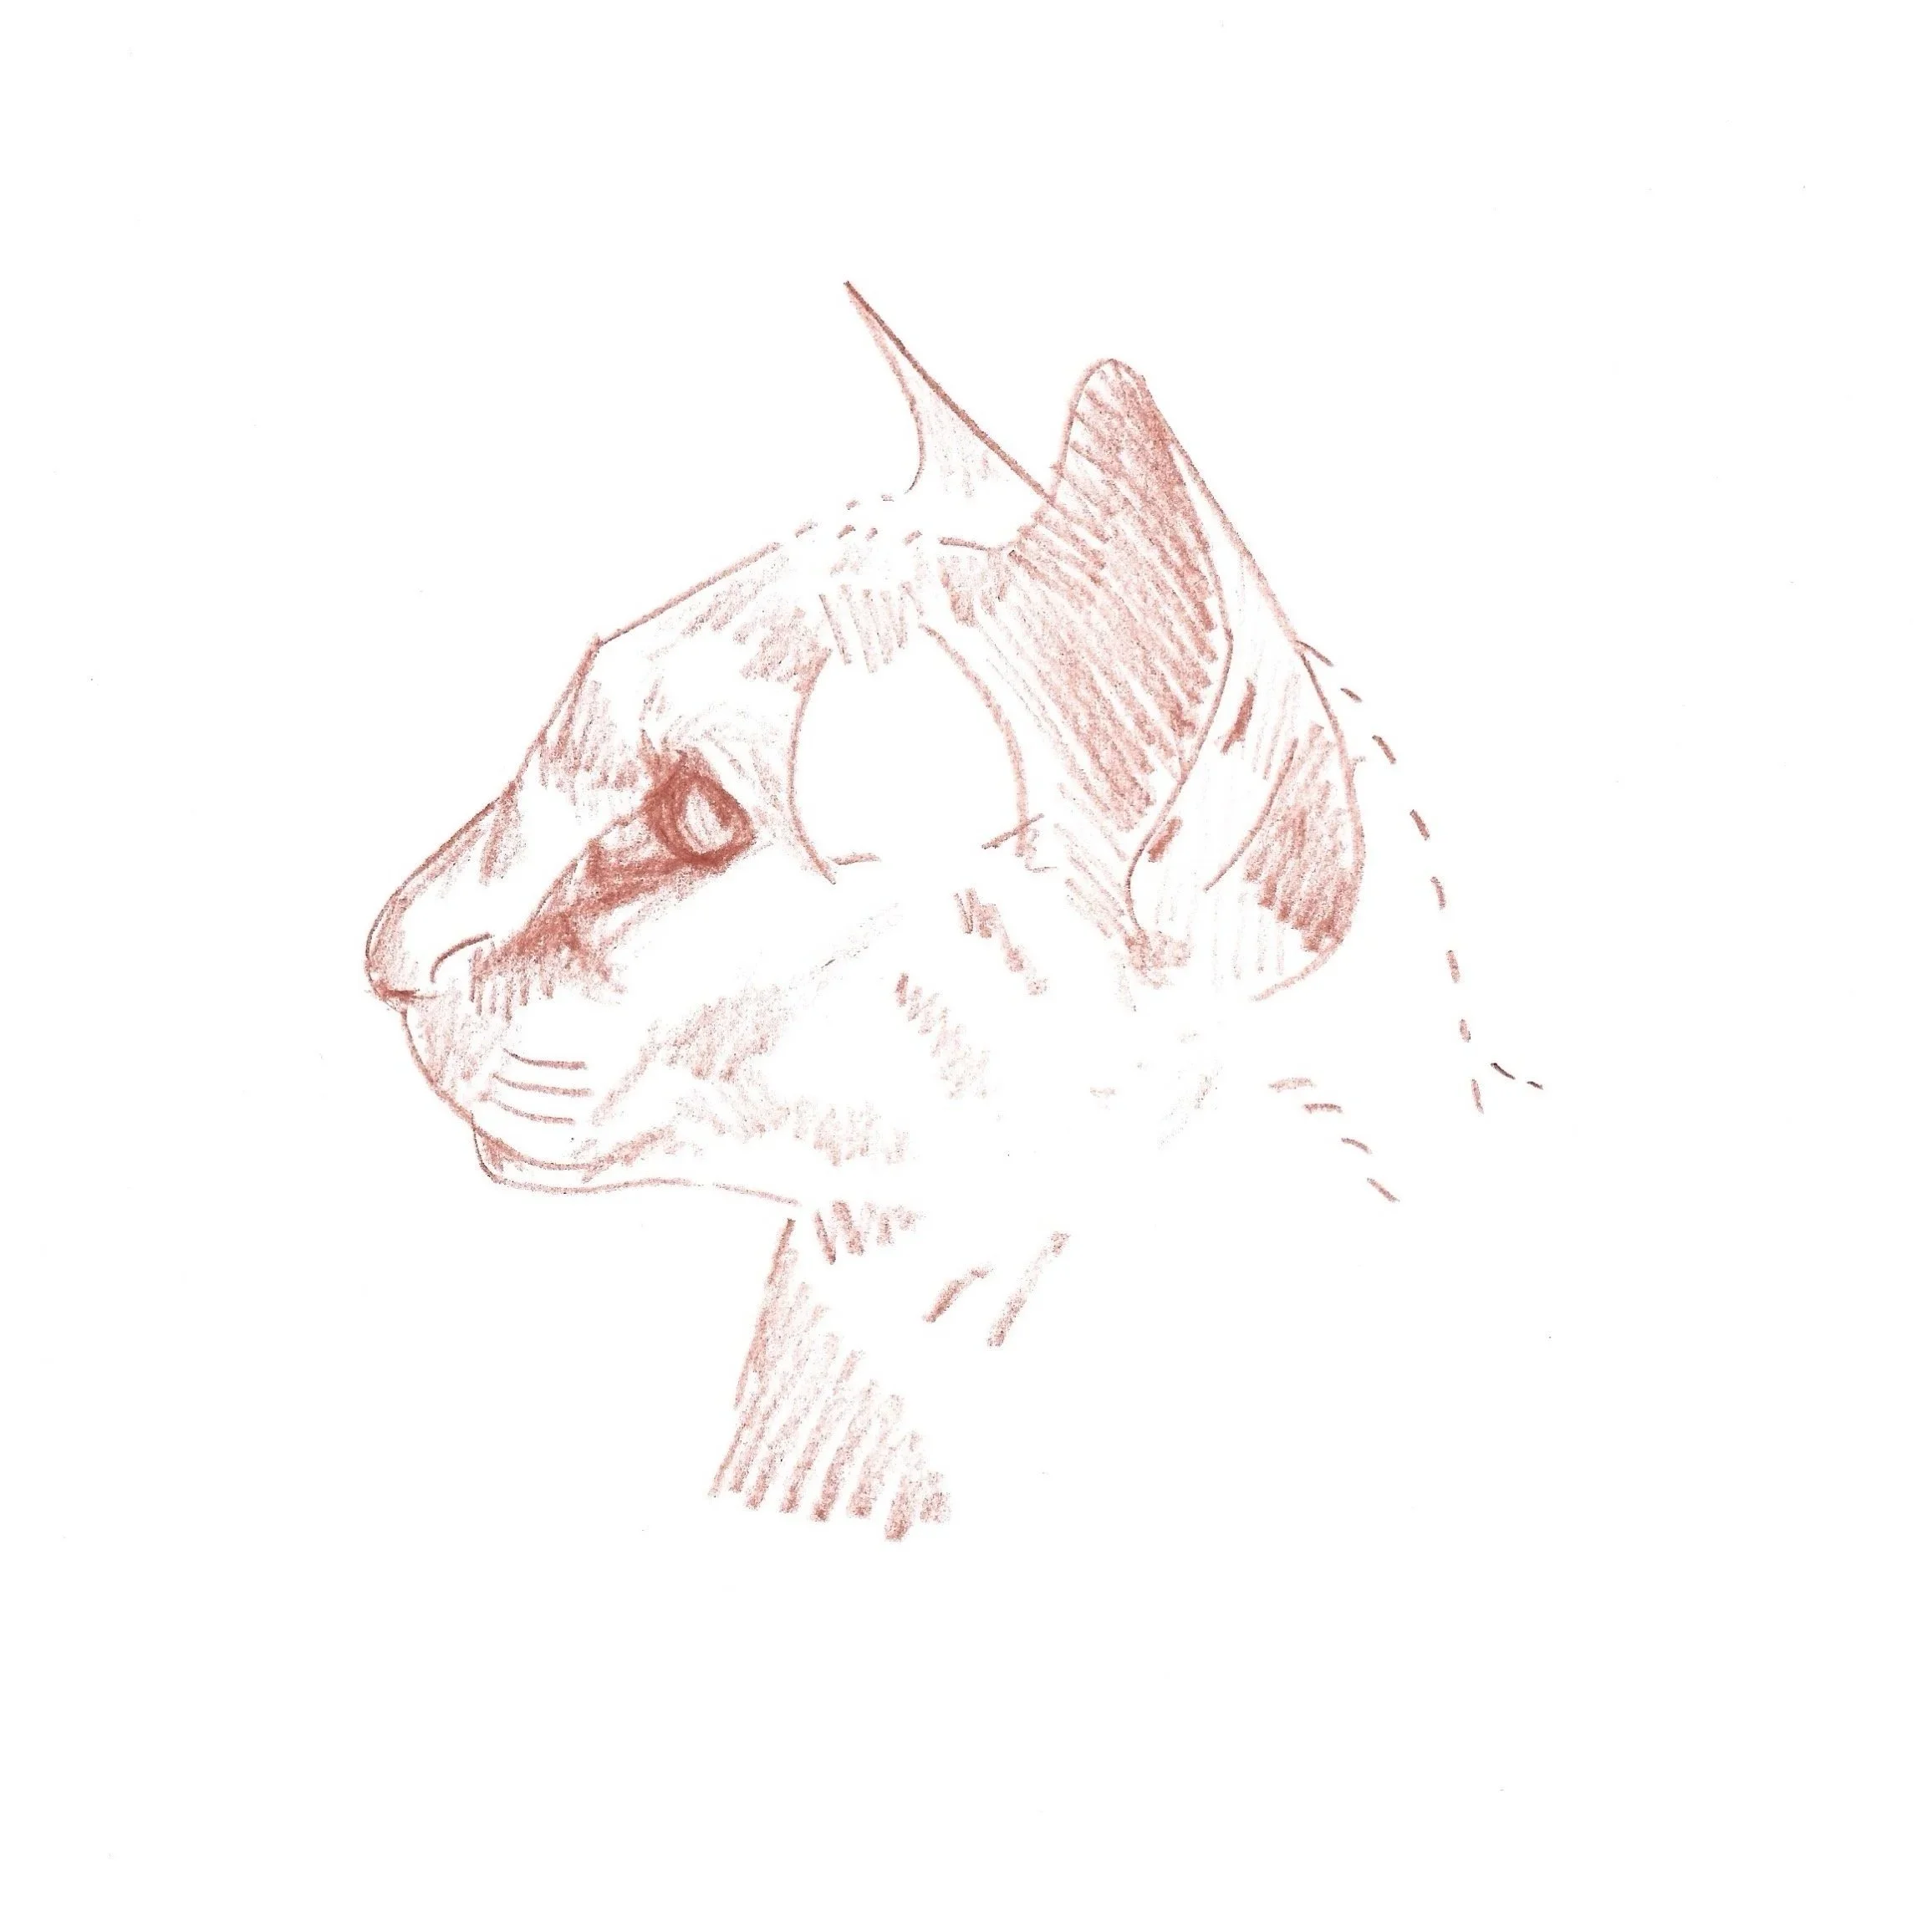
Paper on top. Trace key shapes. We're aiming for rough - not ooh that's a triacontagon - think that whisker pad area looks like a circular blob. That ear is a triangle. No cone. No triangle. Take the print out away. The construction lines - if you squint - do they look like a cat? No? A tangled web you say? Try again.
When you’re happy, try the exercise again, but this time map in some of the darker values (see below).
In the example on the video, see how I've broken down Pumpkin's face into simple geometric shapes? The triangle from forehead to nose, the oval of the skull, the angular lines that suggest cheekbones. This isn't about precise measurement—it's about training your eye to see structure first.
That Week I Fell Down the Anatomy Rabbit Hole
(Yes I am aware of how that sounds, and yes I did leave it in).
A little while ago, I spent a solid week just learning anatomy — not because I had to, but because I wanted to. There’s something deeply satisfying about pulling on the “why does that shape look right?” thread and seeing where it goes.
Animators, for instance, need to know how bodies move — how bones and muscles shift. And while I don’t plan to switch careers, there's definitely a part of me that dreams of drawing from imagination (so my cats in Pictionary stop looking like dogs and vice versa).
The more I learned, the more I realised: everything is related to function. Even cartoon dogs are front-loaded. Cats are built differently.
I considered turning it into a proper resource, but feared a mass newsletter exodus from readers terrified I'd break out the tweed and an overhead projector. So instead, I'll dribble in snippets where useful.
Here’s one: Siamese cats are angular. They're brilliant for learning subtle anatomy shifts — cheekbones, eye placement, the structure of the skull. These micro-differences matter when you're refining portraits.
I can't give you a universal rule (proportions vary by breed). But I can show you what I see.
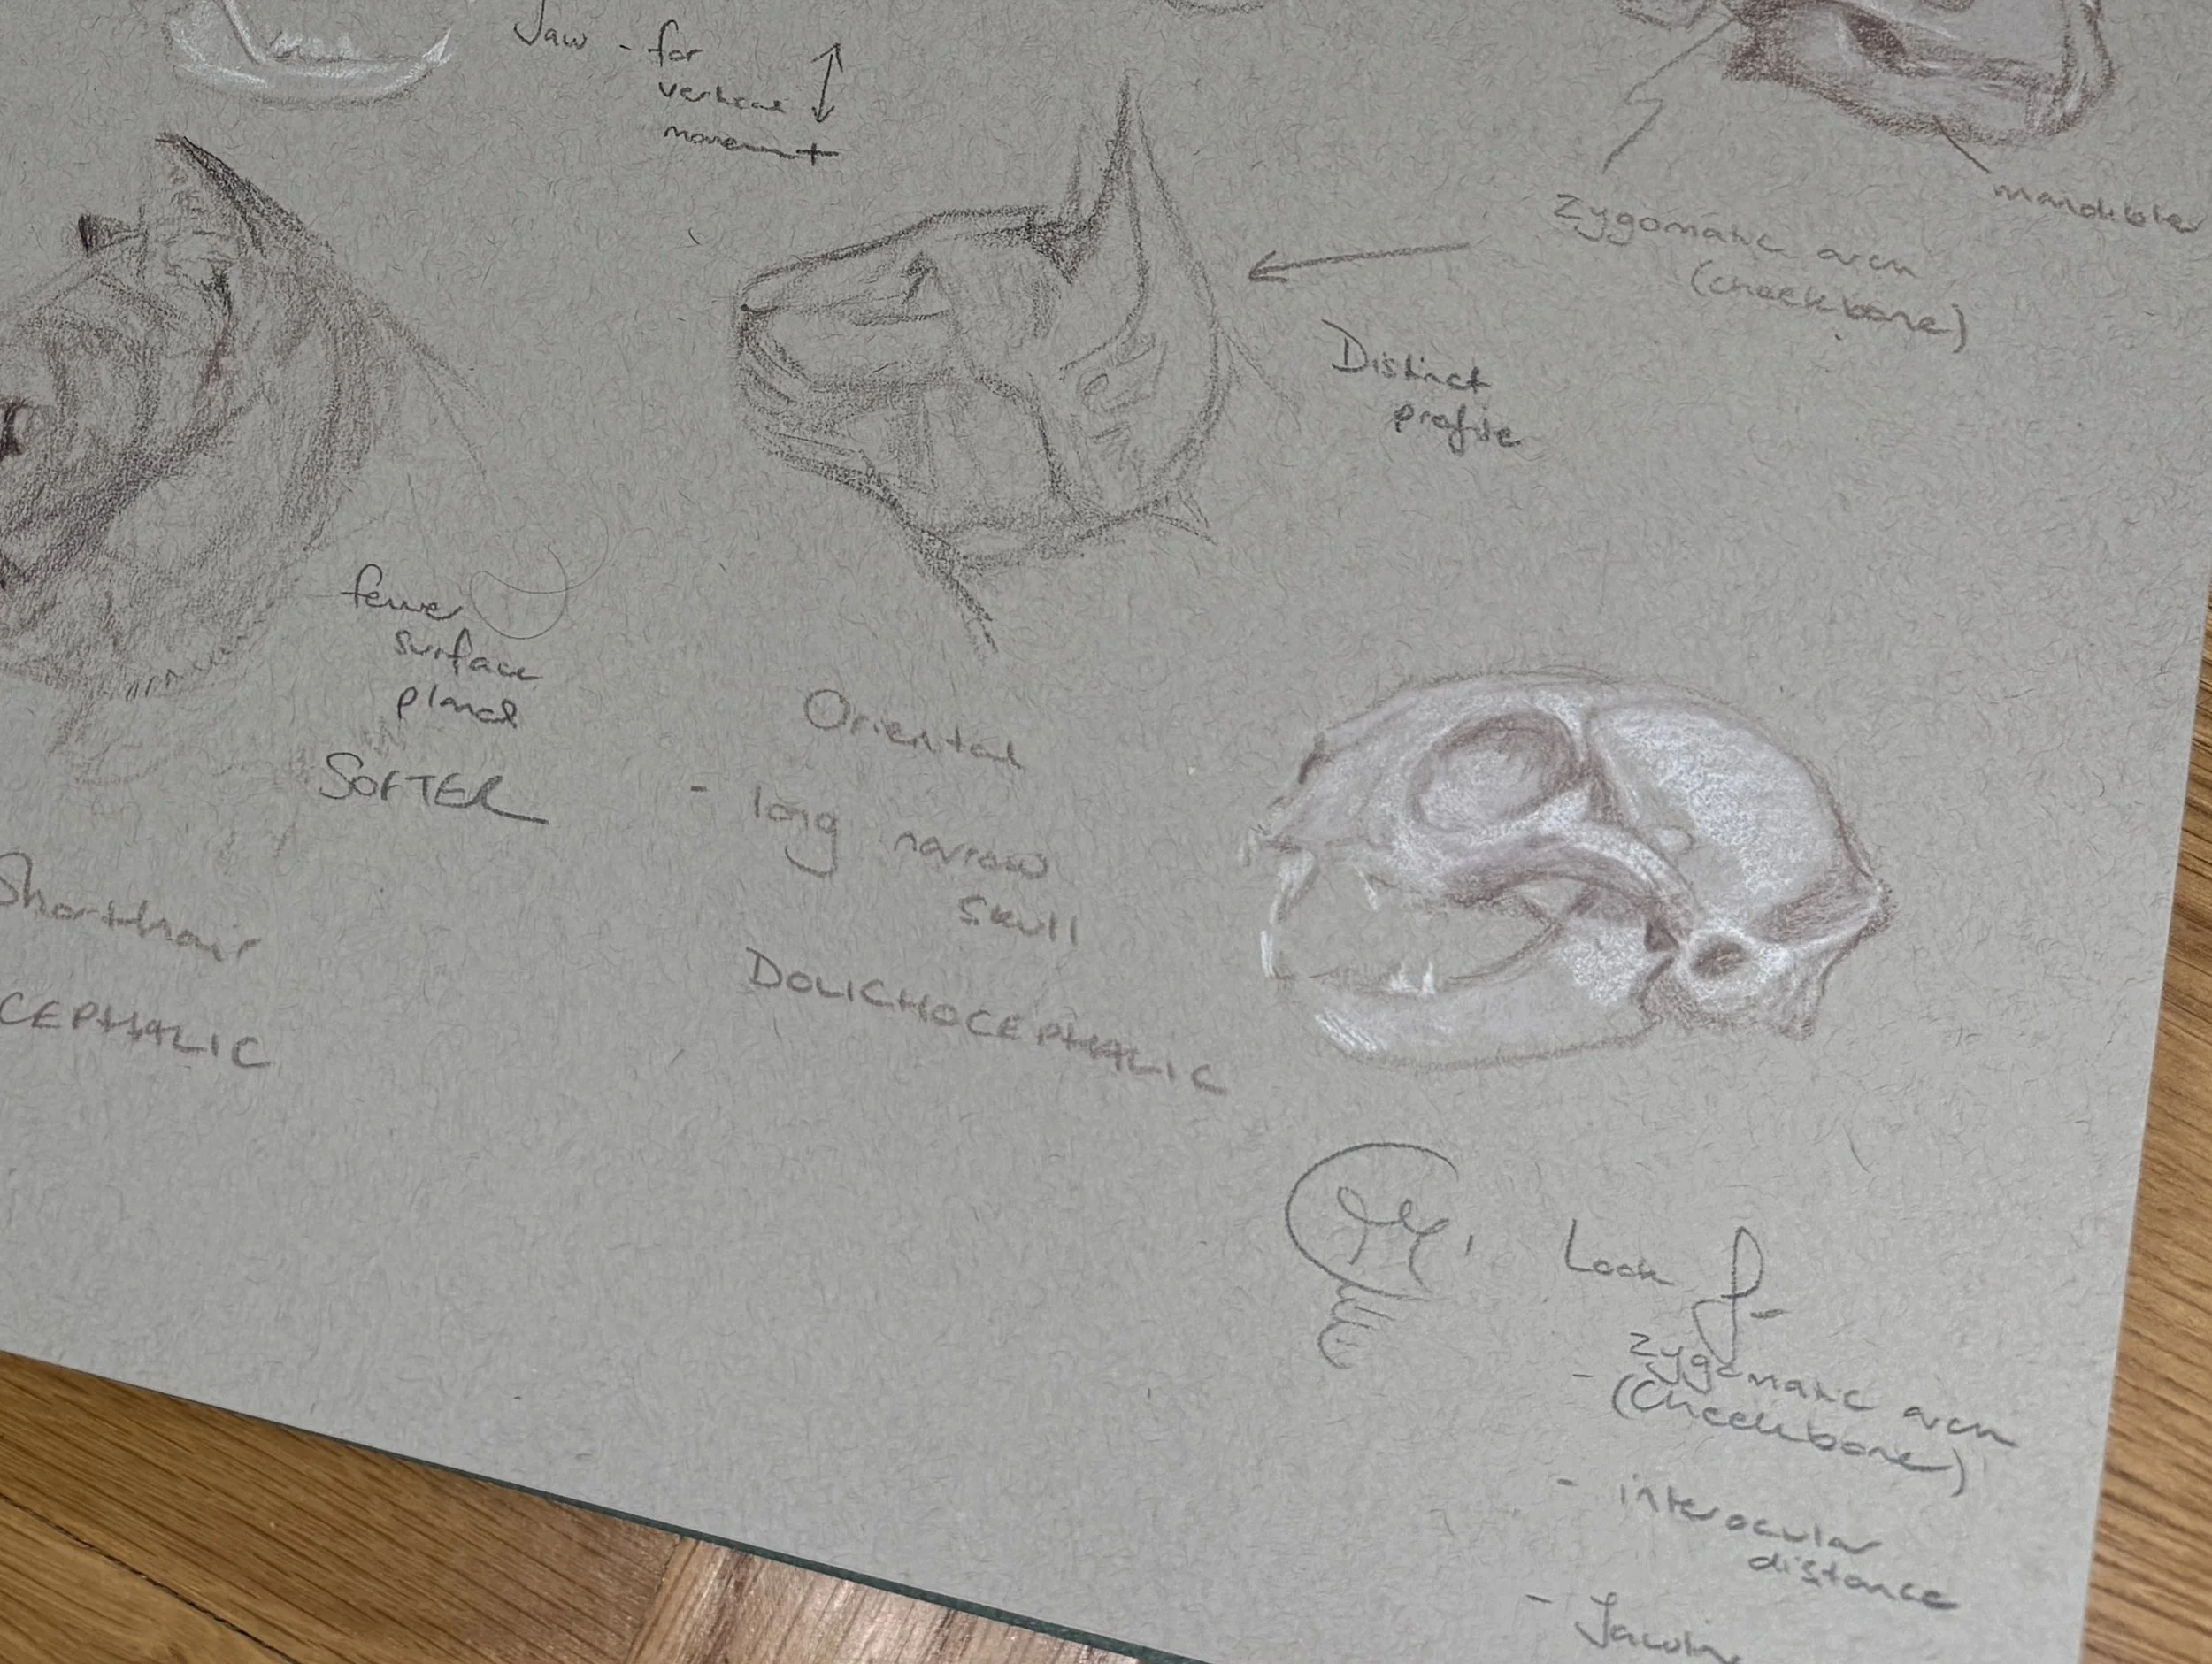
Long Narrow Skull of Oriental Cats
Cheekbone is prominent
Value Mapping (and Letting Go of Colour)
Next, try a value mapping exercise. Scribble in the darker patches you can see, leaving the construction lines visible. Don't worry about fur texture yet—just ask yourself: where are the shadows? What's catching the light?
This foundation thinking—understanding what's underneath the surface—is exactly what I mean when I talk about seeing beyond the fur.
The Videos: Construction to Completion
Now here's the main video—the complete process on paper. It shows all my steps with full voiceover, but it's not a tutorial you need to follow precisely - honestly, I’m not sure that would even work - you’d lose your natural fluidity. Start with the head shape, then the nose/muzzle. How are you going to position the eye? What landmarks could you use?
Watch how I constantly check and adjust, how the eyes give me trouble (they always do), and how values create form more effectively than any amount of detailed fur texture.
The way I lay the pencil down changes every time I draw—it's about developing your own way of seeing and responding to what you observe. Sounds a bit vague. Sorry. Honestly? The secret? Acceptance that your first few versions are likely to be poor. Indeed, ‘success’ may feel a little random at first. Sometimes your marks will lie down better than others: the choice? Proceed with the current sketch or start afresh? I can usually tell after 60 seconds and move on.
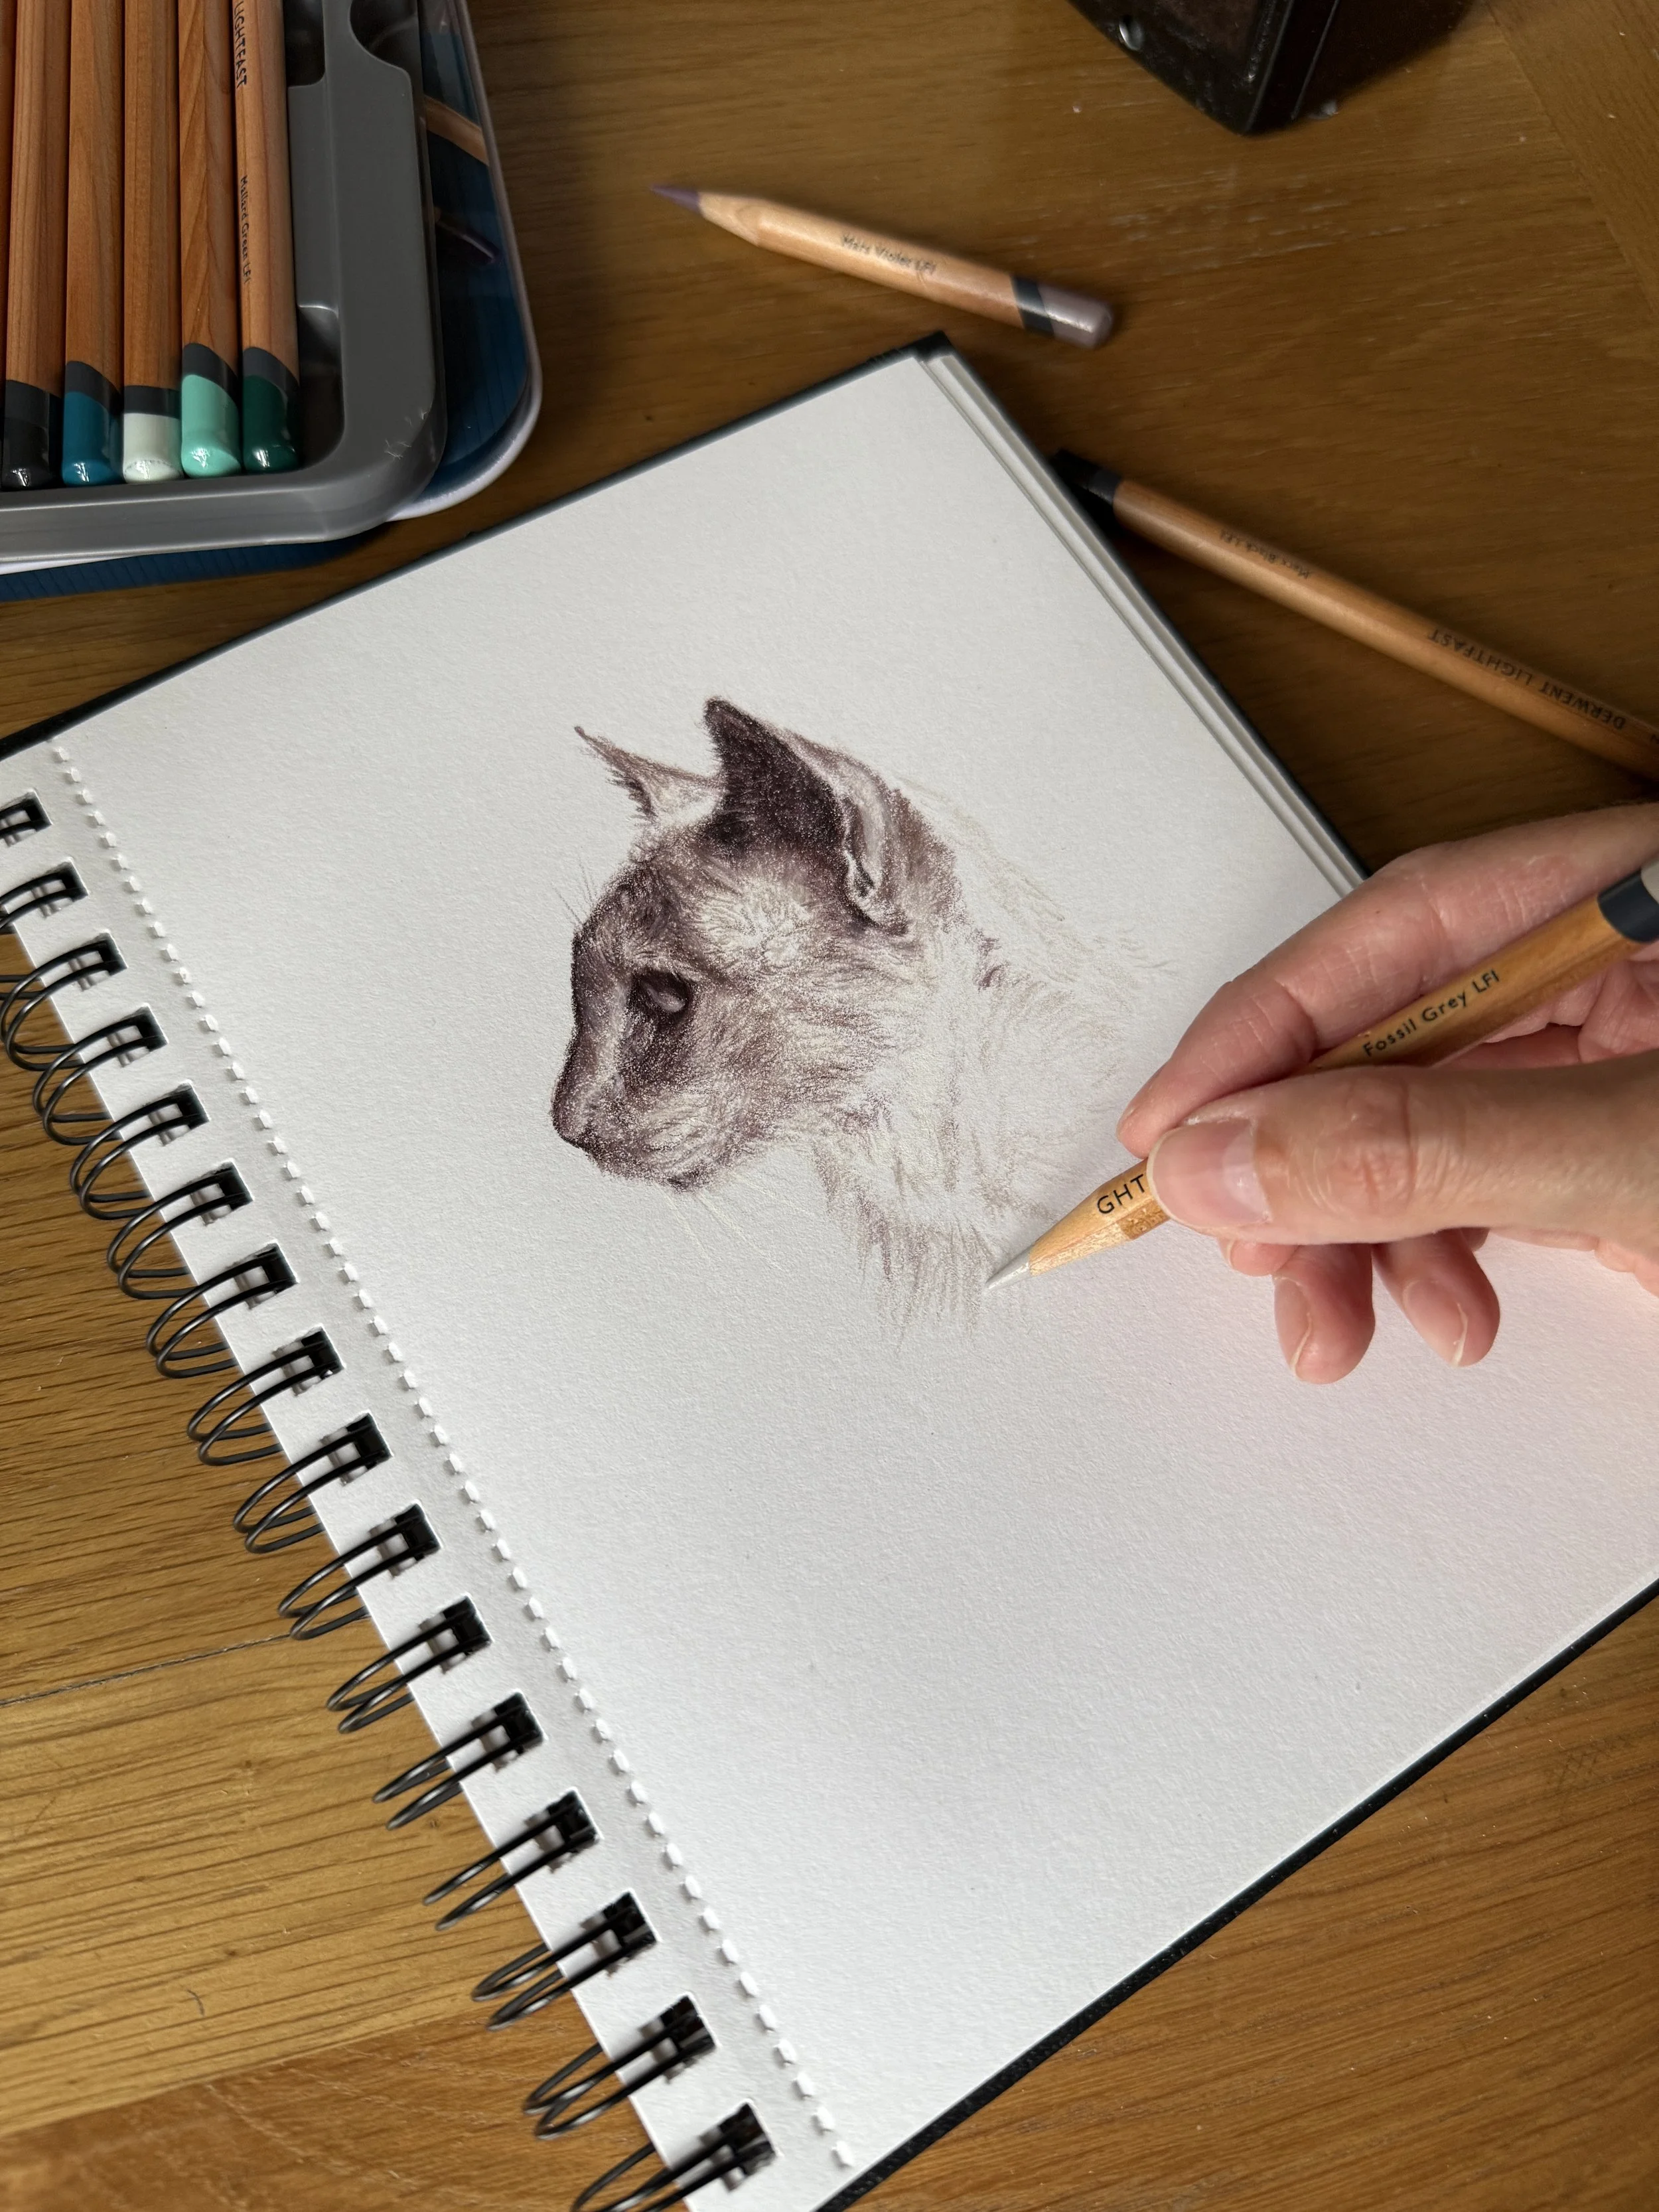
For this sketch, I used:
Derwent Lightfast Fossil Grey: Initial framework and lightest tones
Derwent Lightfast Mars Violet: Mid-tone development
Derwent Lightfast Mars Black: Deepest shadows and structural definition
Plus touches of Taupe (honestly, it’s a bit browny and full disclosure I used it but didn’t need it) and White for refinement of the eye.
But here's the key: it's not about these specific pencils. Use any trio that gives you light, medium, and dark values. Browns, greys, even blues—the principle is the same. You're asking "how light or dark?" rather than "what exact colour is this fur?"
In teacher mode I might say: this approach removes decision fatigue while maintaining full tonal range. Instead of getting lost in colour matching, you're thinking about form, structure, and the values that create dimension.
Pumpkin Sketch
I used a limited palette of dull violet grey tones in a small sketchbook. This exercise is not about colour. It’s about form and value.
Why This Matters for Your Detailed Work
Every realism artist I know has experienced that moment: you're hours into a piece and realise something fundamental is wrong. The proportions feel off, the expression isn't quite right, but you can't pinpoint why.
Quick sketching builds the observational muscle memory that helps you catch these issues early. When you've practiced seeing cheekbones, understanding how eyes sit relative to the nose, recognising the play of light across form, you can spot problems at the two-hour mark instead of the twenty-hour mark.
I used to only notice something was "off" when I was hours into a detailed commission. Now? I can catch it early — because I’ve trained my brain to look beneath the surface.
Other times, I’ll apply a glaze of a darker shade later on, often sweeping a large area to adjust the values to indicate a light hitting a facial muscle.
The Permission to Embrace Imperfection
Looking at my finished sketch, it's clearly not perfect (a hazard of a side-by-side comparison). The proportions aren't exact, and she’s altogether flufflier and more textured than in real-life. But it captures Pumpkin—her alert expression (treats?), the characteristic angles of her Siamese features, the sense of a real, three-dimensional cat rather than a flat drawing.
That's the standard for sketching: not photographic accuracy, but essential capture. Would you recognise this cat in a lineup? Does it feel alive on the page? If yes, the sketch has succeeded.
As I explored in my earlier blog post about having the courage to be terrible, accepting imperfection is crucial for artistic growth. Most of my sketches still don't work—I've improved from a 1-in-50 success rate to about 1-in-10, but inconsistency remains part of my process.
When you start, those first fifteen minutes might feel messy and wrong. And honestly? They often are. But if you stick with it — just long enough for the marks to stop fighting you — you'll find yourself staring at something that suddenly feels alive.
It's not magic. It's practice. But the feeling is magic-adjacent (at least 1 in ten times).
Let me know if you try it — I’d love to see. More sketch breakdowns coming soon (and no overhead projectors, promise).